 | Baffles Log |
|
|
| ||||||
|
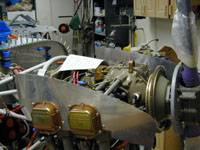
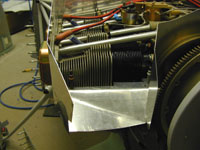
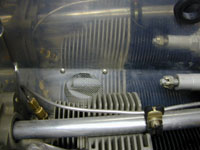
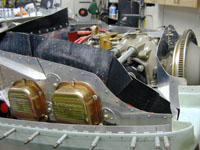
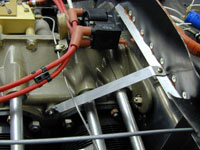
Home Project News February 3, 2021 Project Log Empennage Horizontal Stabilizer Vertical Stabilizer Rudder Elevators Rudder II Wing Kit Wings Fuel Tanks Ailerons Flaps Fuselage Kit Bulkheads Aft Section Foreward Section Top Fuselage Cabin Finish Canopy Cowling Electrical Firewall Forward Fuel System Engine Baffles Misc Miscellaneous Fiberglass Assembly Panel Finishing Up! FAQ Project Notes Project Summary Guestbook Other Stuff | The Engine Baffles play a very important part in cooling the engine. They basically make sure that the cooling air is forced to flow down through the engine cooling fins correctly. I bought the baffle kit from Van's and it has helped a lot but there is still a lot of trimming and fitting that has to be done. Finished the baffle seals on the engine baffles and spent the rest of the time trying to figure out how to seal around the inlets. I drilled the seal material for the inlets. Started on the engine cooling baffles. I managed to get the four pieces that make up the side walls trimmed and fitted.
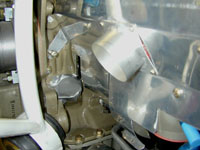
Worked on the rear baffles a little bit. The one on the left doesn't fit well at all and I am having a hard time figuring out exactly how it is supposed to go in there.
Finished trimming the left rear bulkhead and started on the right inlet floor. I worked on the right front inlet some more and once I had it all drilled I started working on the right one. More trimming and tweaking on the baffles. Still more trimming and tweaking on the baffles. I have most of the forward right part trimmed and I am starting on the left side. I'll have a lot of riveting to do once I get them all to fit right. I'm pretty much finished fitting the front parts of the baffles. Now all I need to do is get the back parts tweaked and then I can start trimming them to fit the top cowling.
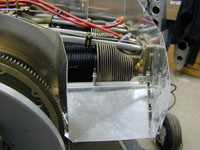
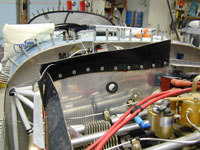
Finished trimming the rear baffle parts so that they would fit just right over the top of the engine. I drilled the hole in the rear baffle sections to the crankcase bracket. I also added a piece of angle to the right rear section instead of the bent flange that comes with the part.
Started trimming the baffles to fit the top cowling.
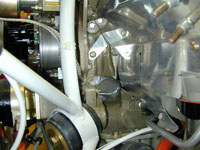
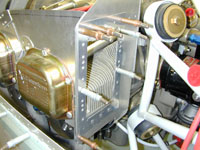
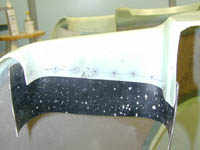
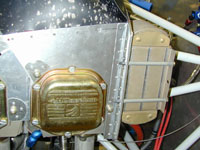
I just about have the baffles trimmed to fit the cowling now. They still need a little tweaking in the area around the inlets though and I am right at 3/8" all the way around so I may have to carve on them a little bit more. Spent most of the evening scratching my head. I am having trouble figuring out how to seal the baffles to the inlet ducts. I think I'm gonna do some more fiberglass on the ducts but for now I'm going inside to look at other's websites. Trimmed the front of the baffles to fit the new inlet ducts that I glassed into the top cowling. I also riveted on most of those little mounting hole doublers and some of the reinforcement angles for the baffles. After getting the cowling back on after the whole adding inlet duct seals thing I decided that most of the baffles needed a little more trimming. I also cut the hole for the oil cooler and drilled the oil cooler doubler plate to the back baffle. I made some reinforcements for the oil cooler to (hopefull) keep it from cracking the back baffles. Drilled the flange for the cabin heat to the baffle and riveted it on with the stainless screen.
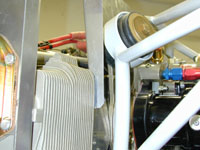
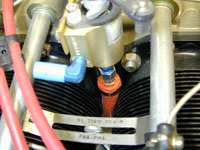
Started fitting the rubber baffle seal material to the baffles. I also made the hose for the return fuel line and drilled the hole in the baffle for it to pass through.
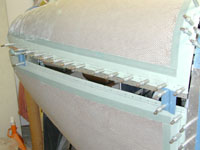
Put on some more baffle seal material. Riveted the baffle seal material on the front left baffle. Riveted the rear left baffle sections together and started cutting the baffle seal material. Still working on the rubber seal material for the baffles. Riveted the seal material to the bottom cowling half. I think the baffles are finished but I am going to wait a little before I install them permanently just in case I need to take them off for some reason.
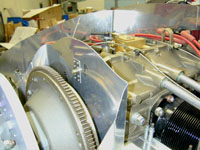
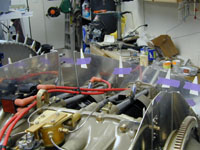
I pulled the cowling off and finished bolting the baffles to the engine.
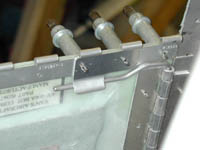
Removed the prop and stored it away. I will probably wait until the airplane is at the hangar to put it back on. I had to go back and fix something that I missed on the baffle. The rear left part of the baffle needs to have an added piece of angle reinforcement when using the baffle mount oil cooler like I am. This was pointed out to me by a couple of guys through email. BTW thanks guys for the notes and if anybody else sees something in these pictures that could be a problem, please don't think that I will be offended if you point them out to me. That is part of the reason that I have this website.
I still needed to safety wire the bottom of the new baffle piece on so I did that. |