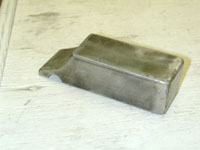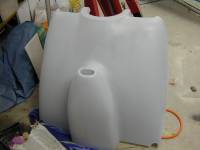
 | Cowling Log |
|
|
| ||||||
|
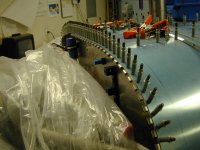
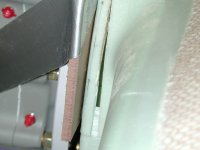
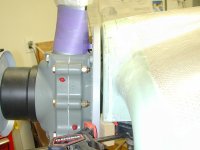
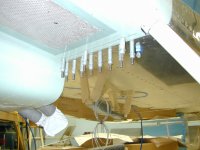
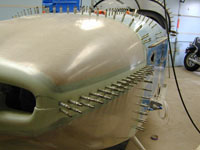
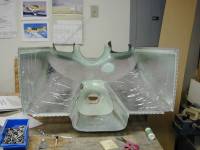
Home Project News February 3, 2021 Project Log Empennage Horizontal Stabilizer Vertical Stabilizer Rudder Elevators Rudder II Wing Kit Wings Fuel Tanks Ailerons Flaps Fuselage Kit Bulkheads Aft Section Foreward Section Top Fuselage Cabin Finish Canopy Cowling Electrical Firewall Forward Fuel System Engine Baffles Misc Miscellaneous Fiberglass Assembly Panel Finishing Up! FAQ Project Notes Project Summary Guestbook Other Stuff | The cowling is made up of two pieces of Epoxy fiberglass. Each half has a honeycomb core that keeps it rigid. The pieces are made oversized and have to be trimmed to fit the plane. It is all held together with piano hinges at the seams. I drilled the hinges that go along the top of the firewall that will eventually hold the top cowling half on.
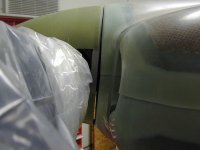
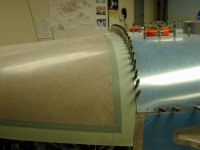
Started fitting the front of the two cowling halves together. Looks like there's going to be lots of sanding. I trimmed and sanded the top cowling half trying to get it to fit just right. The front flange seems to have a problem. It is tilted forward at the top and it looks like about a 1/4" is going to have to be removed or added to get it to fit.
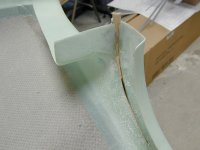
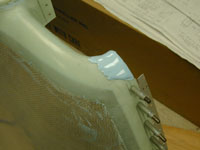
I fit the bottom cowling on temporarily just to get a better feel for what it is going to take to get this whole thing to fit right. After much head scratching and sanding I have decided that the top cowling won't fit as is and I am going to have to cut it. Now how am I going to do that? Okay I think I figured out how to get this thing to fit. I'm going to cut it toward the bottom of the flange and move the bottom forward and then fiberglass it from the back. Today I spent a bunch of time getting it all back together. Then I made the cut and got it all positioned and ready to glass.
All I did tonight was fiberglass over the cut in the top cowling.
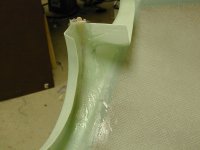
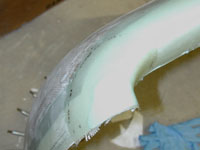
I sanded off the bondo that was holding the top cowling together and then I mixed up a batch of SuperFil and filled the crack.
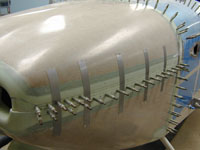
Sanded the filler that I put in the cut on the top cowling. Drilled the top cowling to the hinge at the firewall and started fitting the bottom cowling.
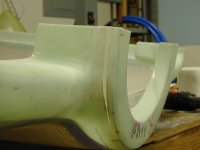
Drilled the hinges that attach the bottom half of the cowling to the bottom of the fuselage and started fitting and sanding the bottom cowling half. I put a little bit more filler up front where I had to cut the top cowling.
I trimmed the back of the lower cowling half and drilled the bottom of the cowling to the hinges. I spent a lot of time fitting and sanding.
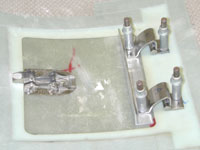
More sanding on the bottom half of the cowling and I managed to get the hinges on the side drilled.
I think I managed to install and remove the top cowling a hundred times today, but I think they fit pretty well. I drilled one of the hinges along the horizontal seam to the bottom cowling half.
Finished drilling the hinges along the seam between the top and bottom halves.
Smeared some Super-fill on the top cowling to help fix the misalignment.
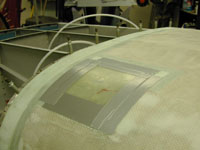
I discovered that I need to have the inlet ducts epoxied to the cowling before I can finish fitting the baffles so I went ahead and did that so they cure overnight. Trimmed on the inlet ducts of the top cowling to get them to fit the baffles. I couldn't decide whether to trim the cowling or the baffles so I trimmed the cowling to see how that works out. If not it's easier to add fiberglass than to add aluminum. I also did some more work on those areas of the top cowl that have to be enlarged to fit the bottom. I layed a couple of layers of glass cloth over the filler that I had put on previously.
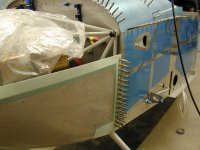
I layed up a couple of fiberglass parts for the top cowling. I am closing off the inlet ducts. I made the other two parts of the inlet ducts tonight. I also realized that I left my digital camera in Littlefield so I am taking pictures the old fashioned way. I really wanted to show how I am closing off these inlet ducts so I will probably scan them when I get the film developed. Today I trimmed and epoxied the new inlet duct parts that I made to the top cowling. I am going to need to do a lot of filling and sanding to get them perfect but for now at least I have enough of it done so that I can finish the baffles. Started finishing up the cowling work. I countersunk all the rivet holes, deburred all the rivet holes and started riveting the hinges on with some epoxy/microballoons slury to help smooth out the rough spots. I mixed up another batch of microballoons and epoxy and riveted on a couple more hinges to the bottom cowling. One more session and I should have the hinges on the cowling halves. Finished riveting the hinges to the bottom cowling half and smeared another coat of Superfil on the top cowling half to try and get the front to fit together better. I got a little carried away with the microballoons on some of the hinges and the cowlings didn't want to fit together very well. So I scrapped a little bit between the hinge eyelets to get them to fit better. It is much better but I should not have put so much on. I did a little sanding and mixed up some more Superfil and put it on the inlet ducts to get them nice and smooth. Fiddled with the cowling some more. I really made a mess of those hinges with the micro / epoxy mix. Still messing with the cowling. I managed to get it to the point where it fits together okay. The hinge pins are still a little hard to install but they'll loosen up. Now I am just trying to get the inlets on the front to look just right, and hide all the rivets. So there is some fiberglass and filler in my future. More sanding and filling on the front of the cowling. It's coming along slowly but it's getting there. More sanding, more filling on the cowling. More sanding / filling on the cowling. I also fiddled around with the baffles a little bit. Prepred the holes where the cowling hinges and firewall attach to the fuselage for riveting. Riveted the cowling attach hinges, forward fuselage and firewall flanges together. Also spent some time sanding on the cowling.
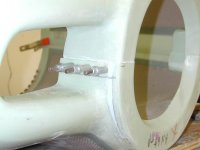
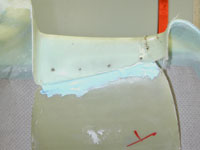
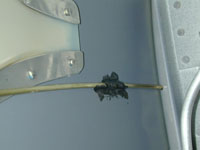
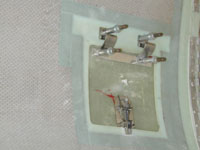
Today I put the cowling back on so that I could figure out how much room I had for the EGT probes and wires and I while it was there I decided to install the little brass tubes where the hinge pins are going to run to secure the top and bottom half of the cowling together. Mine is going to run back into the cabin through two small brass tubes (bought at the hobby store) to the forward bulkhead. I managed to get both tubes JB Welded to the fuselage side and it seems to work pretty well. It is tight but I expect that it'll loosen up over time.
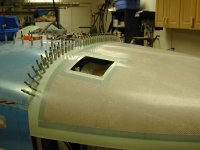
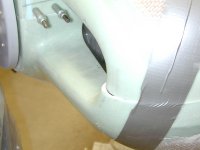
Started working on the little oir filler access door in the cowling.
Finished working on the oil filler door. I think I will wait to rivet it, at least until I decide how best to paint the thing. After I got that done I went ahead and mixed some thinned microballons / epoxy and smeared it on the top cowling to help fill the pin holes.
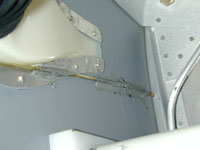
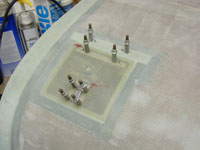
Shannon started cutting out templates for the firewall insulation. I finished the fuel selector plate. I filled the pin holes in the aft skirt with Super-fil. The micro balloons seem to be causing more problems than they are solving so I went back to the Super-fil. I had fiberglassed some stiffeners into the oil door and didn't quite get them right. The door didn't fit as well after I did that. After staring at it for a while I decided that I could cut some slits into one of the stiffeners and re-glass it. While I was at it I fiberglassed a hinge pin retainer on the top cowling for the hinge pins that hold the top cowling half to the firewall. I started working on how I am going to retain the hinge pins that are inside the cockpit and the two on the bottom of the cowling.
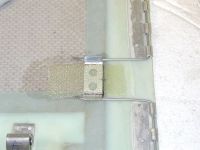
I managed to find a way to retain the hinge pins that hold the two cowling halves together. I drilled a hole in the forward bulkhead and put a really convoluted bend in the hinge pin. I spent the rest of the evening tie wrapping wires while they are still easy to get to. It is only a matter of days before the last skin goes on. Drilled a small hole in the roll bar brace for the compass light wire. Mostly I worked on the retainers for the hinge pins on the bottom of the cowling. Scuffed, primed and painted the top fuse skin. Riveted the oil door to the hinges on the top cowling. Filled some spots on the cowling with Super-fil. I also removed the roll bar brace in anticipation of putting the top skin on. Installed the foil heat sheild material on the inside of the bottom cowling.
Sprayed some surfacing primer on both halves of the cowling.
Sanded on the cowling. |