 | Fuel System Log |
|
|
| ||||||
|
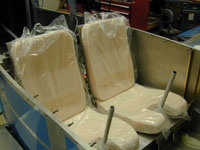
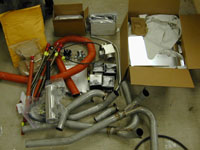
Home Project News February 3, 2021 Project Log Empennage Horizontal Stabilizer Vertical Stabilizer Rudder Elevators Rudder II Wing Kit Wings Fuel Tanks Ailerons Flaps Fuselage Kit Bulkheads Aft Section Foreward Section Top Fuselage Cabin Finish Canopy Cowling Electrical Firewall Forward Fuel System Engine Baffles Misc Miscellaneous Fiberglass Assembly Panel Finishing Up! FAQ Project Notes Project Summary Guestbook Other Stuff | The fuel system on my RV is pretty simple. There are two tanks, Left and Right. The left tank has a flop tube pickup that allows it to draw fuel while inverted. Each tank has a pickup that feeds a fuel selector and from there it goes into the AFP pump/filter assembly. Then it passes throught the FlowScan fuel flow transducer, through the firewall and into the engine driven fuel pump. From there it goes into the fuel injection servo. Worked on the fuel tank vent lines. The seats also came today so I put them in the cockpit.
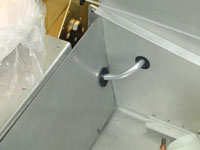
Finished both the fuel vent lines. Made the little screens that go on the bulkhead fittings that serve as the vents, and JB Welded them to the fittings. Finished installing the vent lines (the bulkhead fitting finally cured) and started putting the fuel valve together. I didn't finish the fuel valve because I am waiting on fuel lube to come in.
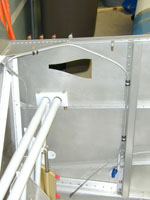
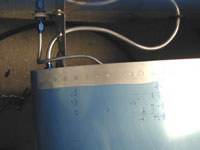
Bent the fuel line that comes in from the right tank. This is the easiest of the two since the left tank has the inverted modification on it and it's pickup comes in from the front of the tak
I got my fuel lube in so I installed the fittings to the fuel selector valve and fit the right fuel line to the valve. Finished up the fuel line going from the fuel selector valve to the left tank. This is the tricky one because the fuel pickup is at the forward end of the tank so there are bends inside the wing root.
Took the right tank off so that I could cut and flare the fuel line. After I flared the fuel line I put the tank back on with a few screws to make sure that everything would fit, and allow me to fit the wing root fairings. Inventoried and stored the firewall forward kit. All I need now is an engine.
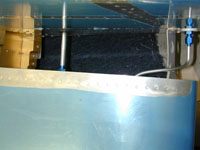
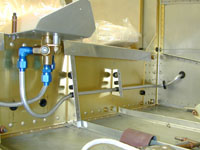
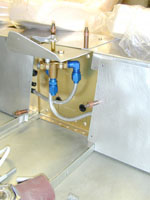
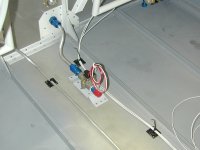
I worked on the fuel system today. I am trying to get that done so I'll know where I can run wires through the floor cover. There are a lot fittings that get added to the system when one decides to go with an AFP fuel injection system. I actually enjoyed running the tubing. Now if I can just figure out how and where to mount the flow transducer. I built a little bracket for mounting the FlowScan fuel flow transducer to the floor in front of the fuel pump and filter assembly. I also worked a little bit more on fuel tubing. I also put the exhaust back on temporarily so that I will be able to check some clearances tomorrow. Riveted the mounting bracket for the FlowScan fuel flow transducer to the floor and installed the transducer. Finished the fuel return line connection to the firewall.
|