 | Cabin Log |
|
|
| ||||||
|
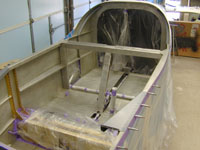
Home Project News February 3, 2021 Project Log Empennage Horizontal Stabilizer Vertical Stabilizer Rudder Elevators Rudder II Wing Kit Wings Fuel Tanks Ailerons Flaps Fuselage Kit Bulkheads Aft Section Foreward Section Top Fuselage Cabin Finish Canopy Cowling Electrical Firewall Forward Fuel System Engine Baffles Misc Miscellaneous Fiberglass Assembly Panel Finishing Up! FAQ Project Notes Project Summary Guestbook Other Stuff | Drilled the baggage compartment bulkhead covers, and made the little plastic wear guards for the shoulder strap anchor cables. Finished riveting the nutplates to the baggage compartment bulkhead. Removed the top skins to get ready for dimpling. Started installing the nutplates to the removable baggage compartment sidewall. Installed the forward baggage compartment side covers. I put in a bracket for the front end of my fuselage wire run conduit similar. It comes out right behind the forward edge of the non-removable seat skins. Installed the hinges to the bottom seat skins and riveted the seat skins to the fuse.
Installed the forward seat panels and fabricated the tunnel cover that goes between the seats.
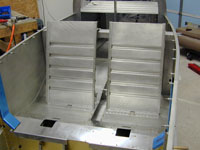
Started building the seat backs. It's taking longer than it should because I need a bandsaw blade. Still building seat backs. Finished fabricating and fitting all of the seat back parts and started deburring, dimpling and preparing all of those parts for priming.
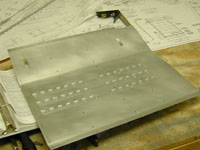
Started fitting and drilling all the forward cabin covers. Finished drilling and fitting all the forward cabin covers. Finished riveting the other seat back and riveted on most of the fuselage / bulkhead gussets.
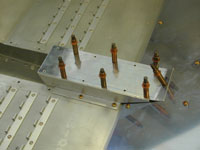
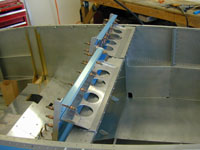
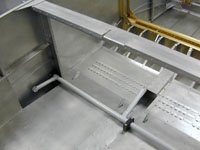
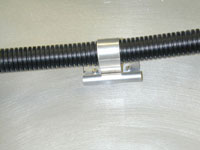
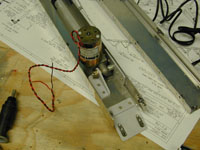
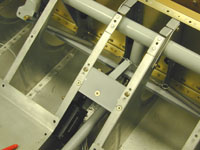
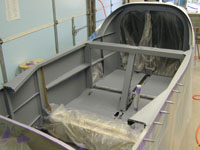
Installed the flap acutator weldment into the fuse, fabricated all the little angles, brackets and spacers for the flap system and started putting the flap system together
Installed some braces to hold the wire conduit that I installed into the fuselage a little better. Piddled with the flap mechanism a little bit.
Almost finished the flap acutator mechanism and made the two little flap actuator pushrods.
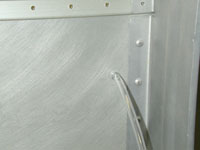
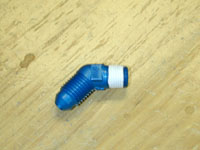
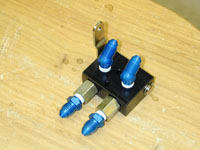
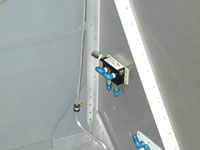
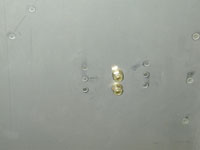
Installed the flap actuator mechanism into the fuselage. Installed the static ports and tubing in the rear fuselage.
Installed all those bolts in the holes that are left in the spar for main gear mounts on the nose draggers. On the real airplane you just fill the holes with bolts. Also put the little clamps on the little pieces of tubing that hold the rudder cable on the back of the plane. Cleaned the shop up some. Reassembled the flap mechanism with the safety wire that keeps the rod end bearing from twisting. Cut the elevator push rod tubes to length, cleaned and etched them in preparation for priming the inside. Primed the inside of the elevator push rod tubes. Drilled both of the elevator push tubes to the end pieces and riveted the end pieces to the big tube. I screwed up the little one by only drilling 4 holes in each end instead of 6. I'll call Van's on Monday and see what they say. I most likely will build another one. This is the elevator after all and it's a cheap mistake. Started making another F-789 elevator push tube. I messed the other one up. Finished building the F-789 elevator push tube. Primed all the aluminum push tubes. Drilled the hole in the elevator bellcrank for future installation of a pitch servo on the autopilot. Installed the control sticks and the electric aileron trim.
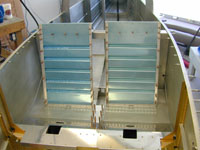
Worked on finishing up all the little details inside the cabin that I seem to have left undone. Riveted the caps on the side of the center section and riveted on the the forward and aft canopy decks. The center section covers turn out to be a mistake. I'll have to drill them out tomorrow because the roll bar bolts have to go in there. Un-riveted the center section covers from inside the cabin. Finished masking the cabin off and scuffed all the places where paint is to land. All I need to do now is clean it real good and paint it. Painted the inside of the cabin with some gray epoxy primer. The plan was to stay with the gray primer since it is pretty tough but I may put some paint on it.
Painted the seat backs and baggage bulkhead covers. I also touched up a few places that I didn't get quite right yesterday. Hopefully the painting is over for a while. Mixed up some more primer and touched up some areas of the cabin that showed up after I opened the garage door and let the sun hit it. Installed the brake fluid reservoir. Built and installed a doubler plate for the parking brake valve. Installed all the fittings into the brake master cylinders.
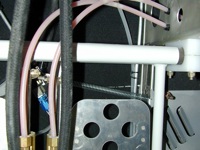
Tubed up the parking brake valve to the firewall bulkhead fittings. Re-installed the rudder pedals (hopefully for the last time). Fabricated the little plates that attach the rudder pedals to the rudder cables, and started tubing up the brakes.
Moved the parking brake valve to the new location, and tubed it up.
Retubed the parking brake valve. I didn't like the way the flares came out the first time and was afraid it wouldn't seal. It's much easier to fix it now than to crawl under the panel later so I decided to play it safe. I also went ahead and tightened up on all the plastic/brass fittings on the brake system.
I installed the last of the nutplates that attach the panel to the structure. I started working on the cabin vents and I replaced one of the bolts on the autopilot servo with a longer one.
Today I was trying to get as many little things done that I could so I can get a bunch of stuff out of the way for the canopy. I finished the cabin air vents, replaced the other bolt,and put in those big washers next to the rod-end bearings for the autopilot servo and I ran the static line through the cabin and up behind the panel. I also took off the rudder and the elevators, getting ready to remove the HS and the VS so I can make some more room in the shop.
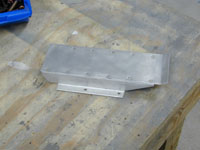
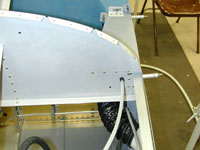
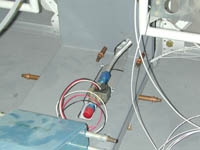
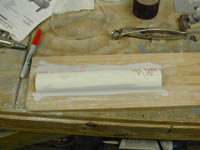
I never finished up the covers that go over all the AFP fuel system stuff in the floor. I really got it all messed up with the fuel flow transducer, so today I spent some time putting it back together so that I can get it finished. I started making a fiberglass cover for the fuel line and fuel flow transducer. I decided that I could make it look better with fiberglass than I could with aluminum.
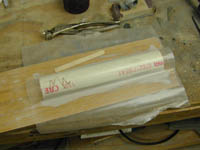
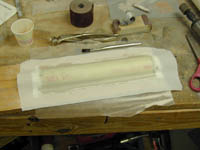
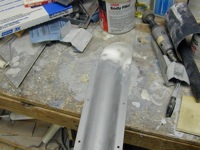
Fiddled with the fuel flow transducer cover that I made and it turns out that it is too small. Back to the drawing board. Bondo'd the new piece of PVC pipe to a board for the new improved (read larger) cover for the fuel flow transducer. Layed a couple of layers of fiberglass on the mold for the cover. Pulled the new piece out of the mold for the fuel flow transducer cover, and fit it between the firewall and the AFP pump cover. I finished the second cover for the fuel lines. It fits pretty good. I also made a template for the armrests. I want padded armrests so I am going to cut some model airplane plywood to fit the armrests so the upholster has something to staple / glue the fabric too.
Cut out the wood for the arm rests. I couldn't find the thickness that I wanted so I cut two pieces of 1/16" model airplane plywood and then sandwiched a piece of fiberglass between them with epoxy resin. Finished the armrest upholstry backing. I drilled three holes through each of them to the armrests. Then I riveted nutplates to them so that I can attach them after the foam and upholstry are on.
Shannon took the arm rest backs to the upholstry shop and they were through with the seats. So I reinstalled the seat backs and tried out the new seat cushions.
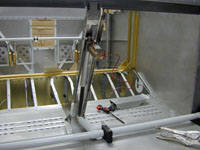
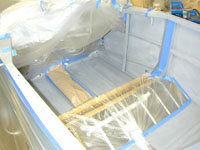
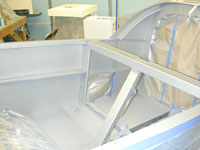
Removed the canopy rails, the seats, seat backs, air vents, fuel vents, the sticks and all kinds of really small pieces of aluminum from the cabin in anticipation of putting a coat of paint in there. The wife and I decided that the primer grey color just wouldn't do. Started sanding all the covers and stuff that I removed from the cabin in anticipation of another coat of primer. The grey epoxy primer that I had in there will cure and not accept a topcoat after a few days so I have to sand it and put another coat of primer on then the paint. Finished sanding and cleaning all of the interior parts. I also managed to get the primer and paint on them all. This is the first that I have seen of the colors that Shannon picked out and I must say I really like them. Started sanding the inside of the cabin to get it ready for paint. Finished sanding the cabin. Vacuumed out the cabin and started masking stuff off. Finished masking off the airplane and covering up all the things in the shop that I did not want to get painted. I cleaned everything and sprayed the primer and paint on the cabin. It turned out pretty good. I wouldn't be too happy with that kind of finish on the outside of the plane but for the cabin it will be okay.
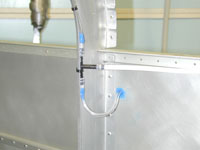
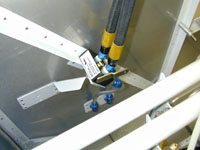
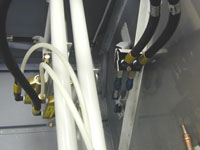
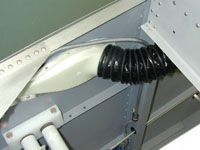
Installed the little slider brace mount for my SIRS compass. Then I spent the rest of the day fitting and cutting out pieces of neoprene for the firewall. It's supposed to be a pretty good heat/noise barrier. Finished gluing the neoprene to the firewall. It turned out okay. I couldn't get to every little spot, but it should make a pretty big dent in the noise. I kinda messed up on the wiring that runs down the center of the firewall and back across the floor. The radius of the bundle was too tight so I had to do a little more fiberglass work on my little cover to get it looking decent. We'll see how it turns out.
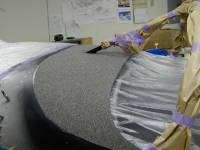
I cut out the upholstry for the top of the glare sheild, sanded the area where I was going to spray glue. I had to mask off a bunch of the plane to put this down. Ironically I had decided to put down cloth to keep from having to mask everything off. I glued the cloth down and I think it will look fine.
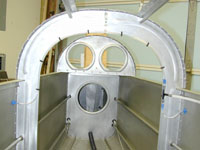
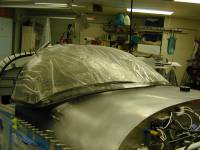
I used a soldering iron to cotterize the edges of the upholstry on top of the glare sheild. I also used the soldering iron to poke the holes up through the skin where the GPS antennas will mount, and mounted the GPS antennas. I put the windscreen on and screwed it down along the roll bar and permanently installed the little clips that hold the front and sides down.
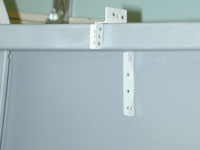
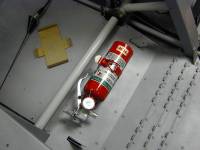
Riveted the fire extinguisher bracket down to the floor right behind the passenger seat. It'll be hard to get to but I think I'll be able to push the seat forward and reach it.
I've been meaning to put a spring on the parking brake valve since I installed it. I finally figured out how to do it. I wanted to drill a hole in the arm of the valve but I couldn't get the drill in there without removing the valve or the rudder pedals. So I took a piece of stainless and made sortof an elongated washer with an extra hole and put it behind the control cable end nut, then put the spring through the little hole.
|