 | Canopy Log |
|
|
| ||||||
|
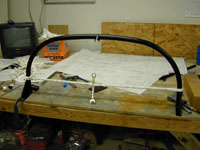
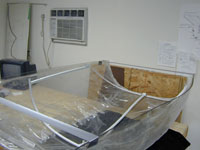
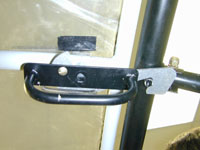
Home Project News February 3, 2021 Project Log Empennage Horizontal Stabilizer Vertical Stabilizer Rudder Elevators Rudder II Wing Kit Wings Fuel Tanks Ailerons Flaps Fuselage Kit Bulkheads Aft Section Foreward Section Top Fuselage Cabin Finish Canopy Cowling Electrical Firewall Forward Fuel System Engine Baffles Misc Miscellaneous Fiberglass Assembly Panel Finishing Up! FAQ Project Notes Project Summary Guestbook Other Stuff | Unpacked and inventoried the finish kit. Cleaned and painted the roll bar black. I don't like the way the white powder coat looks on the slider canopies so I painted mine with a black satin enamel. Pilot drilled the aft decks for the roll bar attach bolts. Trimmed and primed the little spacer blocks that go under the aft deck and started trying to bend the roll bar to the right width. Finished bending the roll bar, clamped and drilled the roll bar to the forward fuselage. Spent way too much time putting the little spacers and nuts up under the aft decks, and bolted the roll bar to the fuselage. I had to make a couple of shims to get it perpendicular to the fuse. Then I cut and fit the roll bar brace and drilled the holes to bolt it to the fuselage and the roll bar. I cut the slider rails to length and drilled the little nylon guide that goes on the back of the canopy frame. Started building the canopy guide track, but I didn't get very far.
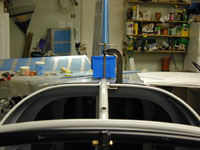
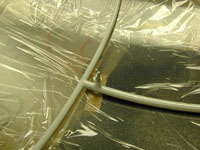
Finished building the slider track and taped the track to the fuselage. I started trying to figure out how to fit the slider frame to the fuselage. This is going to be a patience testing exercise.
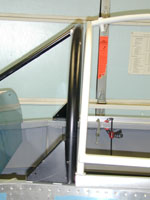
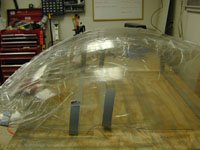
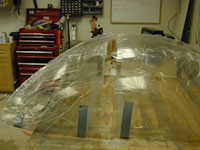
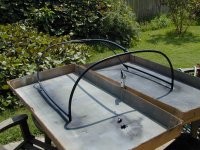
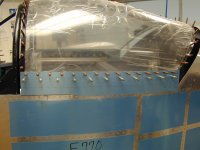
Today I worked on bending the canopy frame. Cussed a little, bent a little, cussed some more, unbent a little, measured, cussed, bent, cussed..... I was a little bit more calm today so I didn't cuss as much but the bending on the canopy frame still progresses slowly. More bending and tweaking on the canopy frame. I am getting close but I am not sure where 'good enough' is on this thing. If it has to be perfect then I am going to be here for a while. More bending and scratching of the head on the canopy frame. I think I may have actually gone backwards today. Tweaked on the canopy a little more. It goes well for a while and then a little backwards then better for a while then backwards. I just have to quit working on it when I start to get frustrated. I think I have the front bow right and the side rails about at the right shape but it seems to taper out a little as it goes aft. I also cut a piece of hardboard to lay in bottom of the aft fuselage so that I can crawl back there and fix a few things. That'll give me something to do when I can't stand the canopy anymore. Maybe I just need to be less picky. Bending on the Canopy frame a little more. I just about quit on the whole thing and then after playing around with a paper sack I decided to try twisting the frame along a different axis, and it seemed to work better. I know have the canopy lined up excpt the aft bow is 1/4" off. Worked on the Canopy frame some more. I'm still bending it this way and that and it still does not want to assume the right shape. I think I may have the canopy frame close enough to work. The left side rail is a little low on the aft end but if there is a way to make it work like that then I'll leave it. I'm gonna give myself a couple of days and then maybe I'll feel like tweaking it just a little more. I installed the little piece of all thread on the rear canopy track. This should help me fine tune the height of the rear of the canopy frame.
Drilled the slider rails to the aft canopy decks. Drilled the rear track to the top of the fuselage. Cleaned up the shop a little bit to make room for moving the big ol piece of plastic around.
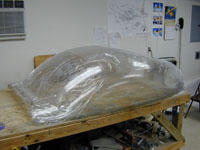
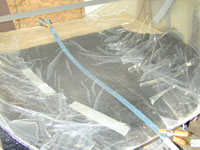
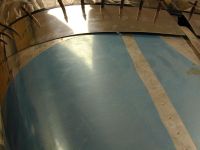
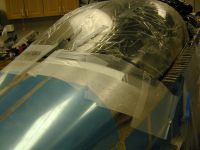
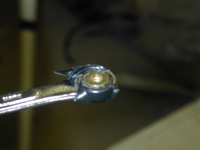
Started cutting on the canopy. I acutally got as far as making the Big Cut. I started by trimming off some of the excess around the outside of the canopy. This is more for practice than anything. Then I put the canopy on the table upside down and figured out where to drill the hole for the latch handle. After that I cut the canopy along the side bows (with plenty of extra) an then I clamped it all together to mark the line for the Big Cut. After taking a break I cut the bubble in two. It is exciting to have that part behind me with no cracks and the cut in the right place.
Positioned the canopy on the frame and clamped / taped it down. Layed out the places where the holes will go into the front bow and the top. I couldn't get the nerve to actually start 'drilling' so I read the manual some more and took another look at the plans and went to bed. I trimmed the canopy a little more. I still had it overhanging the side rails a bit and missed the part in the book where it said to cut it to just above the rails.
I almost finished drilling the canopy to the frame. I left the aft bow undone because the sides were a little long so I trimmed a little bit of the sides to make it fit better. I didn't feel like drilling those holes while I was tired so put the latch mechanism together.
Finished drilling the canopy frame. Marked the sides to the final cut line and started trimming all of the excess from the edges of the canopy.
Finished trimming the edges of the canopy and spent quite a bit of time polishing the edges so that they were nice and smooth and rounded. Also match drilled the cover strip to the top of the canopy and almost finished countersinking the holes.
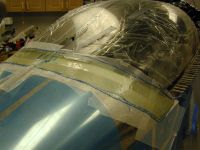
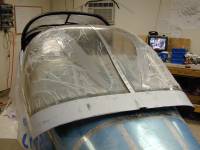
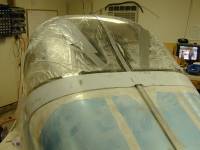
Finished countersinking and enlarging all the holes in the canopy bubble. Enlarged the holes in the canopy frame to #30. Tweaked the canopy frame some more to get it to fit just right and reassembled the whole mess. It actually fits pretty well. I guess all that aggrivation with the canopy frame paid off.
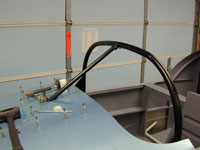
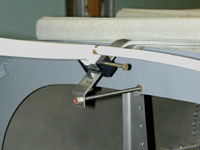
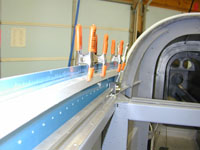
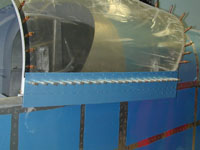
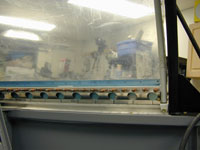
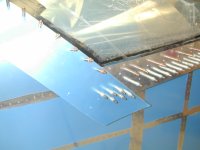
Trimmed and tried the windscreen several times. It's a trial and error kinda thing but it's getting closer every time I try. Trimmed some more on the windscreen. Finished trimming the windscreen. It took a long time but I think I have a pretty good fit. It may still need a little bit of tweaking. I also spent some time getting the edges of the windscreen rounded and smooth. I set the height of the canopy frame to match the roll bar. I almost finished drilling the holes in the slider tracks out to full size. I want to get the slider tracks nailed down before I drill the rollers to the canopy frame, so that I can run the canopy back and forth and make sure it is going to be smooth. Finished drilling the holes for the slider tracks. I also put a couple of screws in the tracks so that I could slide the canopy back and forth to check the alignment of the rollers. I drilled the rollers to the canopy frame, and I also started drilling the windscreen to the roll bar. Finished drilling the windscreen to the roll bar. Drilled the little clips that hold the windscreen down to the forward skin. Countersunk and enlarged all the holes in the windscreen. The windscreen is held to the roll bar with screws so I tapped all the holes in the roll bar for the #6 screws. Finished the latch mechanism, except I didn't trim the hook all the way yet. I want to wait until I get the rear track and anchor blocks down before I commit to that size. Drilled and screwed down the rear canopy track, even though by the manual this should be done after the anchor blocks it seems to me that it would work out better if I nail that track down first. We'll see.
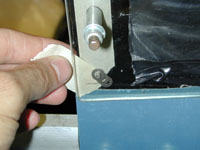
A couple of the screws on the rear canopy track were still sticking up a little bit so I tweaked the countersinks a little. Also Messed around with the little anchor blocks that hold down the rear of the canopy. Adjusted the rear of the canopy down a little bit because the rear anchor point pin was going to go into the block a little bit high. it still is a bit high for my liking and it looks like the weldment is different from one side to the other, so I also made a 1/8" shim to go under the anchor block hold down. I bet nobody will notice it as long as we don't tell anybody. Finished the rear canopy anchors, and trimmed the canopy latch a little more. I think I'll save the last bit of trimming on the latch until it's all together. It still seems to have a little bit of give in it.
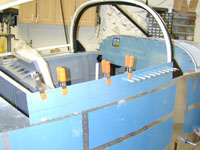
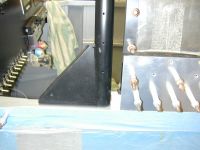
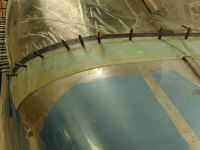
Layed out and drilled the holes in the canopy side skirts. I drilled the side skirts to the canopy frame and then started drilling the C-759 inside canopy skirt and I mananged to mess it up. I am not sure that following Van's instructions is the best way to install this part or not. They call for drilling the side skirt to the frame first and then putting the inside skirt between the two and drilling it. Well mine wound up working it's way down while I was drilling the holes and by the time I got to the aft end of the frame it was so far down that it interfered with the frame. I'll order another on Monday. I clamped the C-759 on the other side of the plane hoping that I would not mess it up like I did the right side on yesterday. Nope, I messed it up too. I guess I'll have to figure out another way to do this. ARGGGHHHH, If I'm not an alchoholic by the time I finish this canopy it will be only by the grace of God. I went ahead and made up the side skirt braces and that is about all I can do on the canopy until I get the parts. Since I'm waiting for canopy parts I made the little plate for the throttle/prop/mixture controls to mount to the panel and measured lentghs for throttle and mixture so that I can get those on order. I managed to get most of the side skirt parts drilled and fitted. There are a lot of holes in those things. I trimmed the relief in the front of the side skirts where it clears the curve in the fuselage as it slides back and I took the hole thing apart and started preparing all the parts for paint.
Prepared, primed and painted all the canopy frame parts. Finished mounting the cabin heat box. I also test fit the exhaust just to see how things were fitting up front.
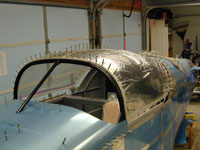
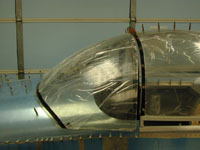
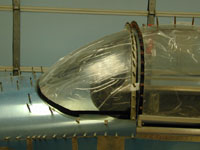
Re-mounted the newly painted canopy frame. Riveted the side skirt braces to the frame clecoed the bubble back on. I also sized and cut the strip of aluminum that goes accross the back of the canopy and clecoed it on.
Shannon came out and helped me drill the canopy side skirts to the side skirt braces. Dimpled and primed the side skirts and the side skirt braces. Finished countersinking all the rivet holes on the side skirts. Dimpled all the holes in the side skirt brace. I also trimmed the plastic away from the canopy in all the places where it contacts the frame and reassembled the canopy on the plane. Then I put the #6 screws in that hold the canopy to the side skirts. Started trimming and fitting the aft skirts. Made a strap duplicator for finding the holes on the aft skirts. I also played around with the alternator to see how it fits. Did a little bit more trimming on the aft skirts and started drilling one of them to the frame. Shannon came out and helped me drill most of the rear skirt to canopy frame rivet holes. It looks like the thing may fit together after all. Finished trimming the aft canopy skirts. I had to trim a little corner off of the side canopy skirts because the edges were right on one of the canopy to frame rivets. Shannon helped me drill the last few holes that attach the aft skirts to the side skirts and I finished trying to get them to fit just right.
Today I decided to change gears a little bit and go back to work on the canopy. I had decided that I was going to do the aft skirts in fiberglass but I didn't feel like getting the epoxy out today so I put the first skirts that I made on and I've about decided that I may be able to make them work. It seems that I had the canopy too far back when I did the initial fitting so I may be able to trim them down and get them to fit. I'll work on it for a few nights and if it doesn't go my way then I'll go back to the fiberglass idea.
Trimmed on the aft skirt of the canopy. I think it may work out. Still more trimming on the aft canopy skirts. It's looking like it will fit okay but I sure am taking a lot of material off of those skirts. I think it'll look okay when it's all said and done. Decided that the aft skirts weren't going to work after all. I simply have them too tight and the canopy isn't going to close until I trim the completely away. So today I started laying up fiberglass skirts. We'll see how that turns out.
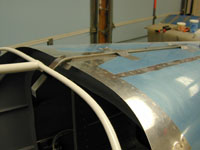
I smeared some Super-Fil on the canopy skirs to help fill the low spot caused by the gap betweent the canopy and the fuselage. Sanded on the aft canopy skirt a little and put another layer of Super-fil on it. Sanded the last of the Super-fil and put two more layers of fiberglass on the aft canopy skirt. I see much sanding in my future. Drilled the mounting holes in the fiberglass aft skirt and then started trimming and sanding to get it to fit just right. It looks like it is going to work okay. It looks a lot better than the metal ones that I made.
Sanded and trimmed on the aft skirt some more. Discovered that the little 'doghouse' that covers the rail is not shaped quite right so I cut it out and layed up another with the little nylon slide as a plug.
Sanded and trimed a little more on the aft skirt. This thing is taking way too long. I layed a couple more layers on the little 'dog house' and another coat of super-fil. I also spent a lot of time cleaning up. It's getting to the point where I can't find things anymore and that's not very productive. I didn't include the cleanup time in the database. Still filling and sanding the aft canopy skirt. While I had some fiberglass mixed up I also glassed some stiffeners to the oil filler door too.
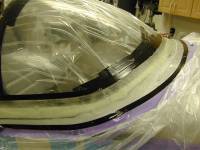
Sanded on the rear canopy skirt a little and then mixed up a litttle filler and smeared it around. Sanded the filler on the rear canopy skirt from yesterday and mixed up a little more. This is a little bit too much trial an error for me but I'm narrowing down on it. Hopefully I'll be able to put this canopy to bed before too long. Sanded the canopy skirt some more, and I think I may have put the last batch of filler on it. Sprayed a coat of surfacing primer on the aft canopy skirt. Sanded the coat of primer that I put on yesterday and then mixed up a batch of epoxy/micro ballons and filled some of the bigger pin holes and scratches that showed up in the primer. It's hard to see those things in the fiberglass but they show up really well in the primer. Sanded on the skirt some more. I hope that all the holes and scratches are filled and I can get this thing done with just a couple more coats of primer. We'll see. Put on another coat of primer on the aft canopy skirt Sanded the coat of primer off the the aft skirt. I think I have more pinholes this time than I did last time. Sanded the aft canopy skirt smooth. Sprayed another coat of surfacing primer on the aft skirt. This was the last one. A little more sanding and it'll be time to rivet the canopy together. I'll be glad to finally get that over with. Sanded the aft canopy skirt, and there were no pin holes. I guess it's done. I also made a little handle for the side of the canopy to help lift it.
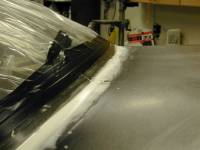
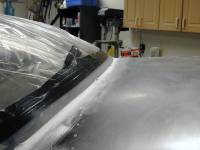
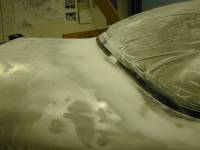
Figured out the line for the fiberglass on the windscreen, and put some electrical tape on it. I also made up some microballons and put some filler between the windscreen and the fuse skin to smooth out the transition for the fiberglass that is coming soon.
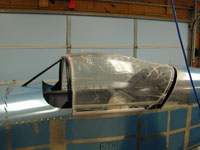
Finished riveting up the canopy. WHOOOPPP!! I really didn't think I'd ever get that thing finished but it's done, it didn't crack and it fits pretty well. Vern came over and helped me get the windscreen ready to fiberglass. We sanded the filler, the plexi and the fuse skin. I wound up moving the tape a little bit because I had gotten some filler up next to it and couldn't clean it up without hurting the tape edge. No sense in getting this far and not doing it right. We decided that I didn't have the right epoxy (I have the fast West Systems and we need the slower 207 stuff) so we postponed doing the layup. The canopy rails moved a little when I had them off for painting the cockpit last year so I piddled with that a little bit and I also added some more filler to a few low spots on the windscreen transition and also on the blind rivets holding the aft canopy skirt. I cut a bunch of strips of fiberglass cloth in anticipation of "The Layup".
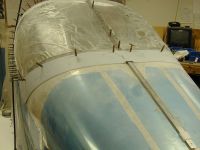
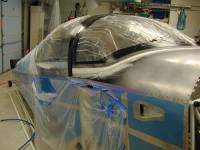
Fiberglassed the windscreen today. It's off to a real good start. Vern did a fantastic job so I don't think that we'll have to spend much time sanding it.
Vern came over and we worked on the fairing for the windsheild. He spent a bunch of time sanding on the fiberglass and then we mixed up a big ol' batch of epoxy / microballons and smeared it all over the thing.
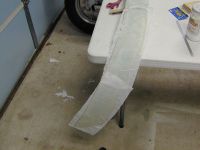
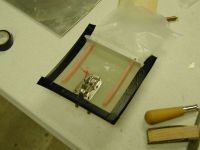
Tonight I was getting ready for doing the fiberglass layup around the windsheid where it meets the canopy. I got a long piece of cardboard and layed it out on the table and then cut three pieces of 8oz BID cloth for the layup. Vern finished sanding the fiberglass transition from the windshield to the fuse and we got the glass layed up between the windshield and the canopy. I got a call from West Houston Airport today and I am getting a T-hangar the first of the month.
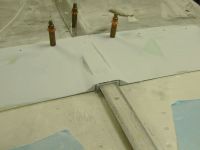
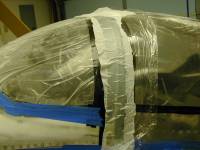
Sanded on the fiberglass roll bar fairing. Cut the roll bar fairing back to the proper width. I sanded and shaped the fairing as best I could and then mixed up a batch of Epoxy / Microballons and smeared it all over the thing, to try and make the transitions smooth. Sanded the filler off of the roll bar fairing and then put some more filler on it. How do people build plastic airplanes? Sanded and sanded on the roll bar fairing. I think I just about have it. It needed just a touch up of filler so I put some of that on it and hopefully I can call it good tomorrow. Installed the rest of the little #8 screws and nuts that hold the canopy rails down.
|