 | Project Log - August, 2005 |
|
|
| ||||||
|
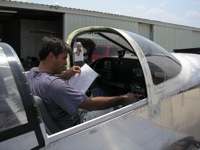
Home Project News February 3, 2021 Project Log Empennage Horizontal Stabilizer Vertical Stabilizer Rudder Elevators Rudder II Wing Kit Wings Fuel Tanks Ailerons Flaps Fuselage Kit Bulkheads Aft Section Foreward Section Top Fuselage Cabin Finish Canopy Cowling Electrical Firewall Forward Fuel System Engine Baffles Misc Miscellaneous Fiberglass Assembly Panel Finishing Up! FAQ Project Notes Project Summary Guestbook Other Stuff | Jeff loaned me his torque wrench and crows foot wrench that will fit the prop so I managed to get those torqued and safetied. I bought a better angle finder today so I spent some more time making sure that the ailerons are rigged correctly before I rivet those stops on permanent.
Finished up on the ailerons. Torqued all the rod end bearings for all the aileron controls and the sticks. Re-safetied a couple of things that I decided weren't safety wired correctly. I also fixed the fuel gauge. Apparently the polarity of the little converters for my E.I. FL-2CA dual fuel level gauge matters. The black wire is the ground and the white wire is the plates. I also riveted on the center section side covers.
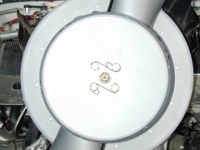
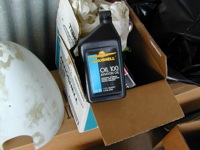
Jeff came by the hangar today and helped me calibrate the fuel tanks. We filled each tank up measuring the fuel as we put it in and calibrated the pre-flight stick. Then we lifted the tail into flying position and took the fuel out and calibrated the gauge on the way down. Then we managed to get the preservative oil out and the mineral oil in. Jeff put the air fliter on permanent. This is all in preparation for running the engine tomorrow.
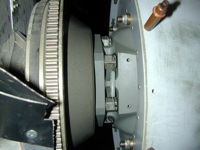
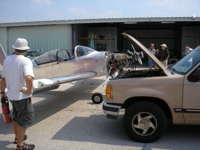
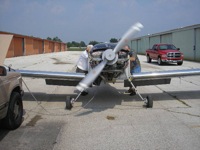
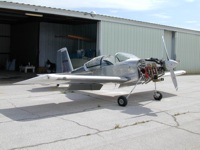
Jon and Marshall came by in morning and we spent time putting the spark plugs in, tying up loose ends. We spun the engine with the starter to pre-oil the engine. We pulled the plane out to start it up and found a fuel leak right where the fuel line comes through the firewall. After making one hose up we turned the bulkhead fitting around. I guess the fitting is just a little out of shape and the softer aluminum tubing formed to it better than the hose end. We took the plane out again and then I ran the battery down. Marshall brought his truck over and we hooked up the jumber cables and managed to get the thing to start. It ran great once we burned the gook out of it. The idle is a little high and it seems the front spinner bulkhead is wobbling a little bit. Other than that it ran real smooth. The runup went okay, the prop cycled fine but the mag was a little rough but I suspect the plugs are pretty well fouled from the preservative oil. The electronic ignition is smooth as it can be. After shutdown we rolled it back into the hangar and looked it over and I couldn't find any leaks or stuff coming loose. It might actually fly some day.
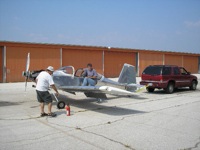
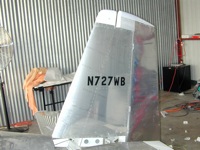
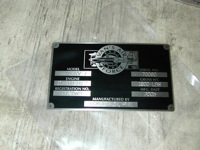
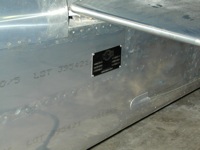
I decided to try and make sure that the spinner was lined up okay. I checked the front bulkhead and it did have a lot of wobble in it but I was sure that the spinner was true. I put the spinner on and tried to check it but every time I moved the prop the whole airplane would shake around and it was impossible to tell. So since the airport bums were there I rolled it out again and started it up with the spinner on. They both said that it ran true. I had also turned the idle adjustment a half a turn and it seemed bring the idle speed down to about 850 RPM. It had been at 1050 and I'm chasing 750. It ran pretty rough on the mag this time. Worse than it did on Sunday but it has been idling so I probably just need to run it up and burn the plugs off. Finished putting the tail number on and installed the dataplate. I lowered the exhaust a little bit.
Today was a details kinda day. I sealed the baffles with RTV and sealed the firewall penetrations. I re-safetied the dipstick tube because it was a little loose. I bled the brakes and loosened a couple of the brake pedals that were sticking. I put the screws in the wingtips. I took that hose off that we made to fix the fuel leak last Sunday and put firesleeve on it. When I put it back on the fuel leak was back. I'm gonna replace that bulkhead fitting, and I may redo the fuel line inside.
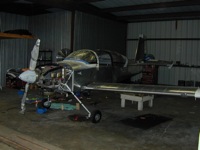
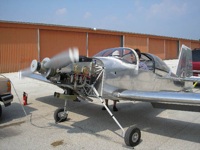
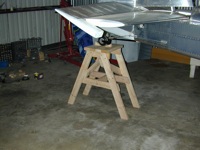
I built a stand to prop the tail of the airplane up. This get's it into flying attitude for weighing and oil changes and stuff.
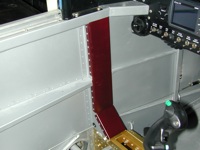
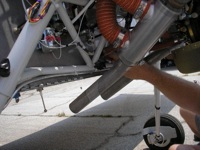
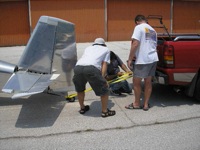
I put a coat of paint on the little tailwheel control arm that came with my new Rocket Steering Link. I think this thing will fix the rudder bottom interference issue that I have. I also had to cut 1-1/2" off of the co-pilot stick. I had never realized that it would get tangled up in the mixture control when the mixture was all the way back. Not that I'll ever be able to fly like that but it still needs to be clear. You may be asking how I can get the stick tangled up with the mixture control. My throttle/prop/mixture/purge controls are located about 6-8" to starboard because I thought that was more comfortable for me. It is but I didn't realize that it would interfere with the 'other' stick. No big deal. Shannon helped me replace the bulkhead fitting where the fuel goes through the firewall. It seems that is cause of my fuel leak. So far it seems to be holding. I also remade the tubing that goes from the FloScan turbine meter to this bulkhead. Just in case. Installed the Rocket Steering link on my tailwheel. I did this to try and solve the interference issue that I was having with the chains. It works. Once I got the tailwheel sorted out I decided to taxi it around a little bit so today was the first day it moved under it's own power. I did a run up and found a really fouled plug on the number 4 cylinder. If I ever doubted my decision to buy an istrument that shows EGT's on all four cylinders I won't doubt anymore. I knew which cylinder it was in a few seconds. Once that was over, Daryl Helped me get the fuel drained out and then we weighed it. 1068lbs!! Whooop!! Nice and light. Now I really have to buckle down and get that paperwork done and get an inspection scheduled. I put the fuel back in the plane and took all the bottom spark plugs out and cleaned them. I had cleaned #4 but decided to clean them all before I ran the engine again. Jeff came over with his compression gauge and we checked the compressions after I ran the engine a little bit. It is still not running quite right. It stumbles a little bit. I also mangaged to get the new firmware and airspeed limitations uploaded to the Dynon. |