 | Project Log - February, 2005 |
|
|
| ||||||
|
Home Project News February 3, 2021 Project Log Empennage Horizontal Stabilizer Vertical Stabilizer Rudder Elevators Rudder II Wing Kit Wings Fuel Tanks Ailerons Flaps Fuselage Kit Bulkheads Aft Section Foreward Section Top Fuselage Cabin Finish Canopy Cowling Electrical Firewall Forward Fuel System Engine Baffles Misc Miscellaneous Fiberglass Assembly Panel Finishing Up! FAQ Project Notes Project Summary Guestbook Other Stuff | Sanded the coat of primer off the the aft skirt. I think I have more pinholes this time than I did last time. Today I worked on a bunch of little details. I installed a little switch for the canopy latch warning light. I worked on the new fuel selector plate (I was never happy with the old one.) I replaced all the nylok nuts that I had in the engine compartment. I also put the washers on each end of the tubes on the oil cooler. It seems that having the raw aluminum tubing against the oil cooler flanges is causing some pre-mature failure. The fix is to shorten the tubes and install some washers between them and the flanges.
Shannon started cutting out templates for the firewall insulation. I finished the fuel selector plate. I filled the pin holes in the aft skirt with Super-fil. The micro balloons seem to be causing more problems than they are solving so I went back to the Super-fil. I had fiberglassed some stiffeners into the oil door and didn't quite get them right. The door didn't fit as well after I did that. After staring at it for a while I decided that I could cut some slits into one of the stiffeners and re-glass it. While I was at it I fiberglassed a hinge pin retainer on the top cowling for the hinge pins that hold the top cowling half to the firewall. I started working on how I am going to retain the hinge pins that are inside the cockpit and the two on the bottom of the cowling.
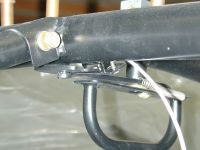
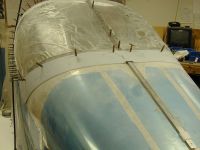
Borrowed the 9-pin D-sub punch from work and put another 9-pin connector on my map box. It'll be for my Garmin GPSMap 296 that I plan to mount on my panel. I want to be able to get the NMEA information out of it while flying. Sanded the aft canopy skirt smooth. Made up some brackets for holding the top spark plug wires. Actually all I did was secure the right side ones to the fuel return hose and the left side I screwed it to the cross brace for the baffles. Sprayed another coat of surfacing primer on the aft skirt. This was the last one. A little more sanding and it'll be time to rivet the canopy together. I'll be glad to finally get that over with. Sanded the aft canopy skirt, and there were no pin holes. I guess it's done. I also made a little handle for the side of the canopy to help lift it.
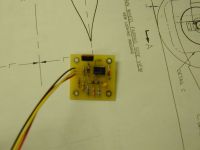
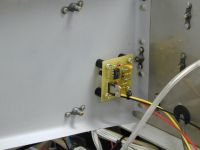
Installed and wired the Low Voltage Monitors. I made these circuits from a schematic that Bob Knuckles sent me. I also wired the small inverter that will eventually power the E.L. light that I plan to put under the glaresheild.
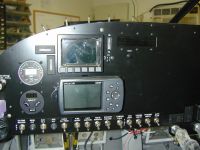
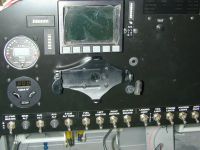
Installed my Garmin GPSMap 296. I bought a marine mount to steal the plastic clip from, and installed it on the panel, right below my Dynon. I intend to mount th antenna that came with it up on the glare shield. I also bought the power / data cable for it so that I could break out the serial port for some data logging.
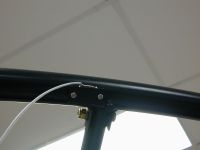
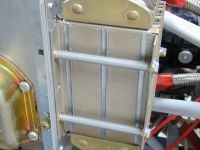
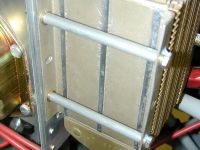
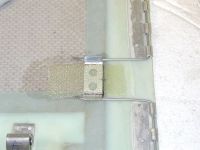
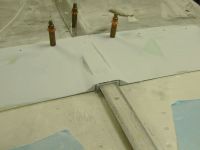
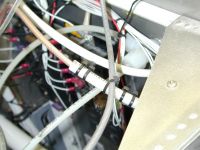
I decided that I didn't want to have to run the autopilot wires from the wings all the way to the autopilot once the wings were on, so I ran all the wires necessary from the back of the autopilot to floor under the passenger seat, and I'll put a splice there for the autopilot. This will let me get the fuel pump installed and all the covers over the center floor panel without having to worry about how to run those wires all the way up to the panel. Installed the little slider brace mount for my SIRS compass. Then I spent the rest of the day fitting and cutting out pieces of neoprene for the firewall. It's supposed to be a pretty good heat/noise barrier. Finished gluing the neoprene to the firewall. It turned out okay. I couldn't get to every little spot, but it should make a pretty big dent in the noise. I managed to find a way to retain the hinge pins that hold the two cowling halves together. I drilled a hole in the forward bulkhead and put a really convoluted bend in the hinge pin. I spent the rest of the evening tie wrapping wires while they are still easy to get to. It is only a matter of days before the last skin goes on. Drilled a small hole in the roll bar brace for the compass light wire. Mostly I worked on the retainers for the hinge pins on the bottom of the cowling. Dimpled the top forward skin and peeled the blue plastic off of it. That plastic is hard to get off after all these years. Scuffed, primed and painted the top fuse skin. Riveted the oil door to the hinges on the top cowling. Filled some spots on the cowling with Super-fil. I also removed the roll bar brace in anticipation of putting the top skin on. Riveted the small pieces that have the nutplates for the panel to the top fuselage skin. It really beat up the paint. I was kinda hoping this would look good but it doesn't. I guess I'll probably wind up putting some kind of upholstry on top of that thing. I also spent some time setting up the EIS engine monitor with ranges and setpoints, and customizing my aux inputs. I also tested the thermocouples with a heat gun to make sure that the proper cylinders read out in the proper place on the EIS. |