June, 2004 June 5, 2004 - 2 hours
Cut the holes in the panel for the trim indicators
June 6, 2004 - 3 hours
Built another throttle / mixture / prop cable mount for the panel. I also drilled holes in each side of the panel for the parking brake cable (pilot side) and cabin heat cable (wife side).
June 7, 2004 - 1 hours
Cut the holes in the panel for the Matronics trim controls. Also layed out the holes for the intercom.
June 12, 2004 - 2.5 hours
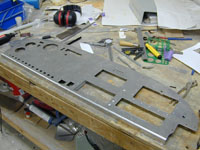
Finished cutting the last of the holes in the panel and riveted the map box on. I put a coat of primer on it all.
The panel has all the holes it's gonna get. Nothing to do now except paint it.
June 13, 2004 - 4 hours
Sanded the panel again and put another coat of primer on it. After that coat set up I wet sanded it and put a coat of black paint on it. I think I'll put one more coat on it and then see how it looks. While paint was drying I mounted the Lightspeed EI module, and started trying to figure out where I am going to run those wires. I also removed the canopy and started taking stuff out of the cabin so that I can get a coat of paint in there.
June 14, 2004 - 1.5 hours
Removed the canopy rails, the seats, seat backs, air vents, fuel vents, the sticks and all kinds of really small pieces of aluminum from the cabin in anticipation of putting a coat of paint in there. The wife and I decided that the primer grey color just wouldn't do.
June 19, 2004 - 2.5 hours
Finished assembling the panel. It's really exciting and now if I only had the cabin painted I could install it and start wiring.
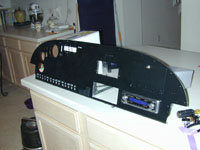
Here is the painted panel and I have started assembling it.
I used a Brother P-Touch 2600 Label Maker to make these labels and used a piece of masking tape to help me keep them straight. The great thing about the 2600 is that it can be connected to a PC and you can do whatever you want with the labels.
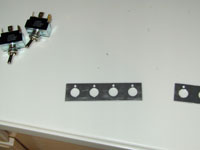
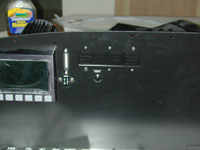
Instead of drilling holes in the panel for the anti-rotation rings on the switches I made these little plates. The switches go through the plates and then through the panel. It worked okay but it would have been better if I had thought of this before I drilled the panel. I had to tweak them a little to get the alignment just right.
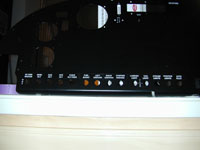
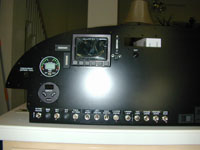
Here is the left side of the panel. There is a pretty big glare from the flash but you can see what's what.
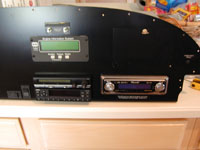
And here is the wife side of the panel.
The only thing missing at this point is the annunciator and a few labels.
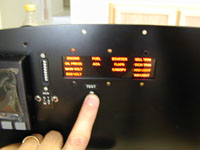
Here is the annunciator that I made. It is basically some LED's behind a photo negative that is behind a piece of tinted plexiglass.
I could not get a good picture of what the annunciator looks like with all the indicators lit up. It does not look like this. First they are crystal clear and second I wouldn't be caught dead with anything orange in my airplane. (Being an Aggie and all). They are LED red. You'll just have to get me to push the test button at a flyin sometime. Trust me it looks really cool. And special thanks to my Aunt Terri for shooting the negative for me.
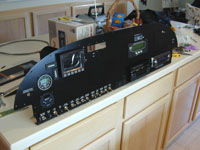
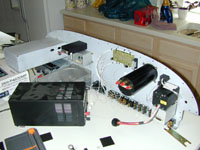
Lots of room behind my solid state panel. You can see my home grown annunicator with the AOA indicator between it and the Dynon which is the long black cylinder.
June 26, 2004 - 2.5 hours
Started sanding all the covers and stuff that I removed from the cabin in anticipation of another coat of primer. The grey epoxy primer that I had in there will cure and not accept a topcoat after a few days so I have to sand it and put another coat of primer on then the paint.
June 27, 2004 - 4.5 hours
Finished sanding and cleaning all of the interior parts. I also managed to get the primer and paint on them all. This is the first that I have seen of the colors that Shannon picked out and I must say I really like them.
June 28, 2004 - 1 hours
Started sanding the inside of the cabin to get it ready for paint.
June 29, 2004 - 1.5 hours
Finished sanding the cabin.