 | Project Log - June, 2003 |
|
|
| ||||||
|
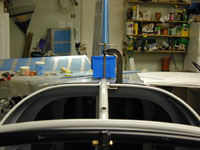
Home Project News February 3, 2021 Project Log Empennage Horizontal Stabilizer Vertical Stabilizer Rudder Elevators Rudder II Wing Kit Wings Fuel Tanks Ailerons Flaps Fuselage Kit Bulkheads Aft Section Foreward Section Top Fuselage Cabin Finish Canopy Cowling Electrical Firewall Forward Fuel System Engine Baffles Misc Miscellaneous Fiberglass Assembly Panel Finishing Up! FAQ Project Notes Project Summary Guestbook Other Stuff | I was a little bit more calm today so I didn't cuss as much but the bending on the canopy frame still progresses slowly. More bending and tweaking on the canopy frame. I am getting close but I am not sure where 'good enough' is on this thing. If it has to be perfect then I am going to be here for a while. More bending and scratching of the head on the canopy frame. I think I may have actually gone backwards today. Tweaked on the canopy a little more. It goes well for a while and then a little backwards then better for a while then backwards. I just have to quit working on it when I start to get frustrated. I think I have the front bow right and the side rails about at the right shape but it seems to taper out a little as it goes aft. I also cut a piece of hardboard to lay in bottom of the aft fuselage so that I can crawl back there and fix a few things. That'll give me something to do when I can't stand the canopy anymore. Maybe I just need to be less picky. Bending on the Canopy frame a little more. I just about quit on the whole thing and then after playing around with a paper sack I decided to try twisting the frame along a different axis, and it seemed to work better. I know have the canopy lined up excpt the aft bow is 1/4" off. The canopy frame was about to drive me nuts so I decided to start building my battery box. I got the parts out and marked the center of the lightening holes. Worked on the Canopy frame some more. I'm still bending it this way and that and it still does not want to assume the right shape. I think I may have the canopy frame close enough to work. The left side rail is a little low on the aft end but if there is a way to make it work like that then I'll leave it. I'm gonna give myself a couple of days and then maybe I'll feel like tweaking it just a little more. I messed up on locating the shoulder harness anchors in the aft fuselage. I only missed by a whole bulkhead. Anyway I have to fix it so I made a couple of parts and started gathering up the tools that I will need when I crawl back there. I crawled into the tailcone to fix a couple of problems. I had drilled the shoulder harness anchors to the wrong place and there was a low spot in my static tubing that I wanted to fix.
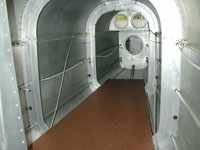
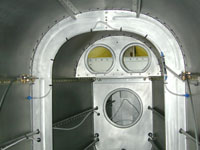
I installed the last of the nutplates that attach the panel to the structure. I started working on the cabin vents and I replaced one of the bolts on the autopilot servo with a longer one.
Today I was trying to get as many little things done that I could so I can get a bunch of stuff out of the way for the canopy. I finished the cabin air vents, replaced the other bolt,and put in those big washers next to the rod-end bearings for the autopilot servo and I ran the static line through the cabin and up behind the panel. I also took off the rudder and the elevators, getting ready to remove the HS and the VS so I can make some more room in the shop.
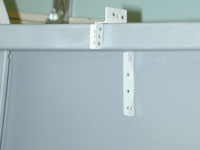
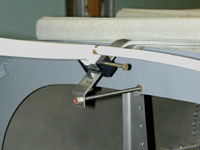
I installed the little piece of all thread on the rear canopy track. This should help me fine tune the height of the rear of the canopy frame.
Drilled a couple of holes for the strobe / position light wires to pass through the aft two bulkheads and the VS spar. I called Van's before I drilled the hole and they said that it would be okay as long as I drilled the hole close to the bottom hinge bracket. I also removed the VS and the HS from the airplane. I was going to need to do that anyway and I am really starting to need the room.
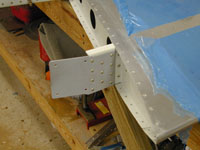
Primed the little spacers and attach pieces of the tail assembly, and riveted the VS attach plate to the VS spar.
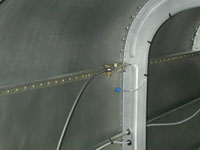
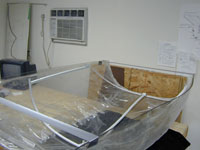
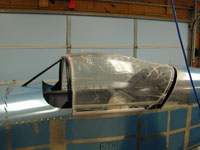
Drilled the slider rails to the aft canopy decks. Drilled the rear track to the top of the fuselage. Cleaned up the shop a little bit to make room for moving the big ol piece of plastic around.
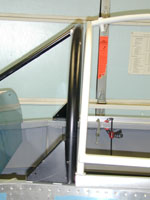
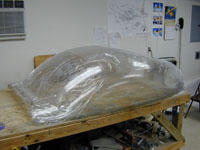
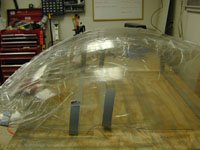
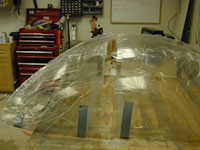
Started cutting on the canopy. I acutally got as far as making the Big Cut. I started by trimming off some of the excess around the outside of the canopy. This is more for practice than anything. Then I put the canopy on the table upside down and figured out where to drill the hole for the latch handle. After that I cut the canopy along the side bows (with plenty of extra) an then I clamped it all together to mark the line for the Big Cut. After taking a break I cut the bubble in two. It is exciting to have that part behind me with no cracks and the cut in the right place.
Positioned the canopy on the frame and clamped / taped it down. Layed out the places where the holes will go into the front bow and the top. I couldn't get the nerve to actually start 'drilling' so I read the manual some more and took another look at the plans and went to bed. |