 | Project Log - December, 2003 |
|
|
| ||||||
|
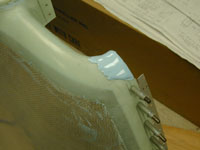
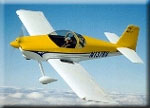
Home Project News February 3, 2021 Project Log Empennage Horizontal Stabilizer Vertical Stabilizer Rudder Elevators Rudder II Wing Kit Wings Fuel Tanks Ailerons Flaps Fuselage Kit Bulkheads Aft Section Foreward Section Top Fuselage Cabin Finish Canopy Cowling Electrical Firewall Forward Fuel System Engine Baffles Misc Miscellaneous Fiberglass Assembly Panel Finishing Up! FAQ Project Notes Project Summary Guestbook Other Stuff | All I did tonight was fiberglass over the cut in the top cowling.
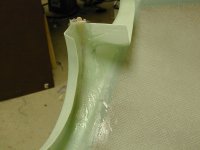
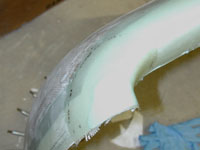
I sanded off the bondo that was holding the top cowling together and then I mixed up a batch of SuperFil and filled the crack.
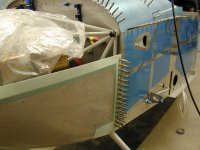
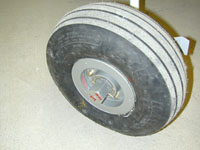
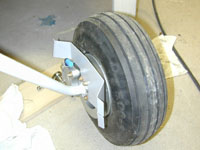
I still hadn't ever gotten around to finishing the brake installation on the main gear. So I spent some time tonight getting all the parts made and putting the rest of the main gear parts together. Sanded the filler that I put in the cut on the top cowling. Drilled the top cowling to the hinge at the firewall and started fitting the bottom cowling.
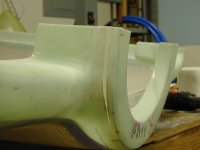
Drilled the hinges that attach the bottom half of the cowling to the bottom of the fuselage and started fitting and sanding the bottom cowling half. I put a little bit more filler up front where I had to cut the top cowling.
I trimmed the back of the lower cowling half and drilled the bottom of the cowling to the hinges. I spent a lot of time fitting and sanding.
More sanding on the bottom half of the cowling and I managed to get the hinges on the side drilled.
I think I managed to install and remove the top cowling a hundred times today, but I think they fit pretty well. I drilled one of the hinges along the horizontal seam to the bottom cowling half.
Finished drilling the hinges along the seam between the top and bottom halves.
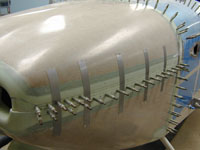
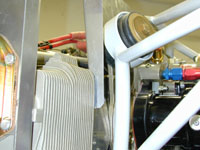
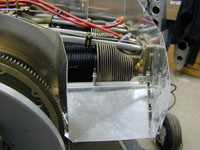
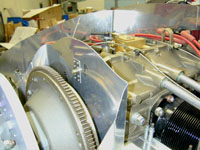
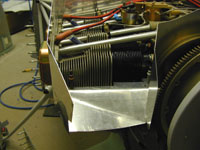
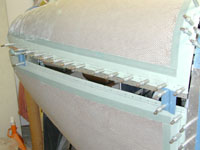
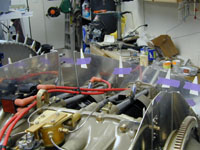
Started on the engine cooling baffles. I managed to get the four pieces that make up the side walls trimmed and fitted.
Worked on the rear baffles a little bit. The one on the left doesn't fit well at all and I am having a hard time figuring out exactly how it is supposed to go in there.
Finished trimming the left rear bulkhead and started on the right inlet floor. Smeared some Super-fill on the top cowling to help fix the misalignment.
Drilled holes in the axles for the cotter pins, and installed the brake calipers.
I worked on the right front inlet some more and once I had it all drilled I started working on the right one. More trimming and tweaking on the baffles. Still more trimming and tweaking on the baffles. I have most of the forward right part trimmed and I am starting on the left side. I'll have a lot of riveting to do once I get them all to fit right. I'm pretty much finished fitting the front parts of the baffles. Now all I need to do is get the back parts tweaked and then I can start trimming them to fit the top cowling.
Finished trimming the rear baffle parts so that they would fit just right over the top of the engine. I drilled the hole in the rear baffle sections to the crankcase bracket. I also added a piece of angle to the right rear section instead of the bent flange that comes with the part.
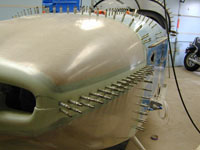
Started trimming the baffles to fit the top cowling.
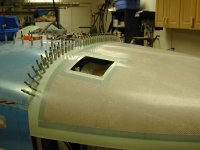
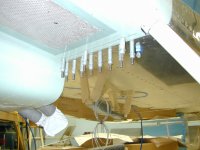
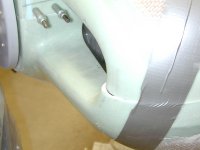
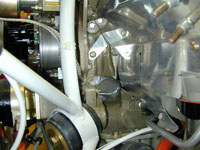
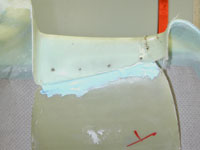
I just about have the baffles trimmed to fit the cowling now. They still need a little tweaking in the area around the inlets though and I am right at 3/8" all the way around so I may have to carve on them a little bit more. I discovered that I need to have the inlet ducts epoxied to the cowling before I can finish fitting the baffles so I went ahead and did that so they cure overnight. Trimmed on the inlet ducts of the top cowling to get them to fit the baffles. I couldn't decide whether to trim the cowling or the baffles so I trimmed the cowling to see how that works out. If not it's easier to add fiberglass than to add aluminum. I also did some more work on those areas of the top cowl that have to be enlarged to fit the bottom. I layed a couple of layers of glass cloth over the filler that I had put on previously.
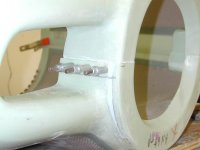
Spent most of the evening scratching my head. I am having trouble figuring out how to seal the baffles to the inlet ducts. I think I'm gonna do some more fiberglass on the ducts but for now I'm going inside to look at other's websites. I layed up a couple of fiberglass parts for the top cowling. I am closing off the inlet ducts. I made the other two parts of the inlet ducts tonight. I also realized that I left my digital camera in Littlefield so I am taking pictures the old fashioned way. I really wanted to show how I am closing off these inlet ducts so I will probably scan them when I get the film developed. |